Sew Cute Patterns

Sewing patterns to create stuffed animals, plush toys and aprons

halloween

Crafting Magic: DIY Mini Witch Hat Halloween Decoration

Free PatternsDiana Cison

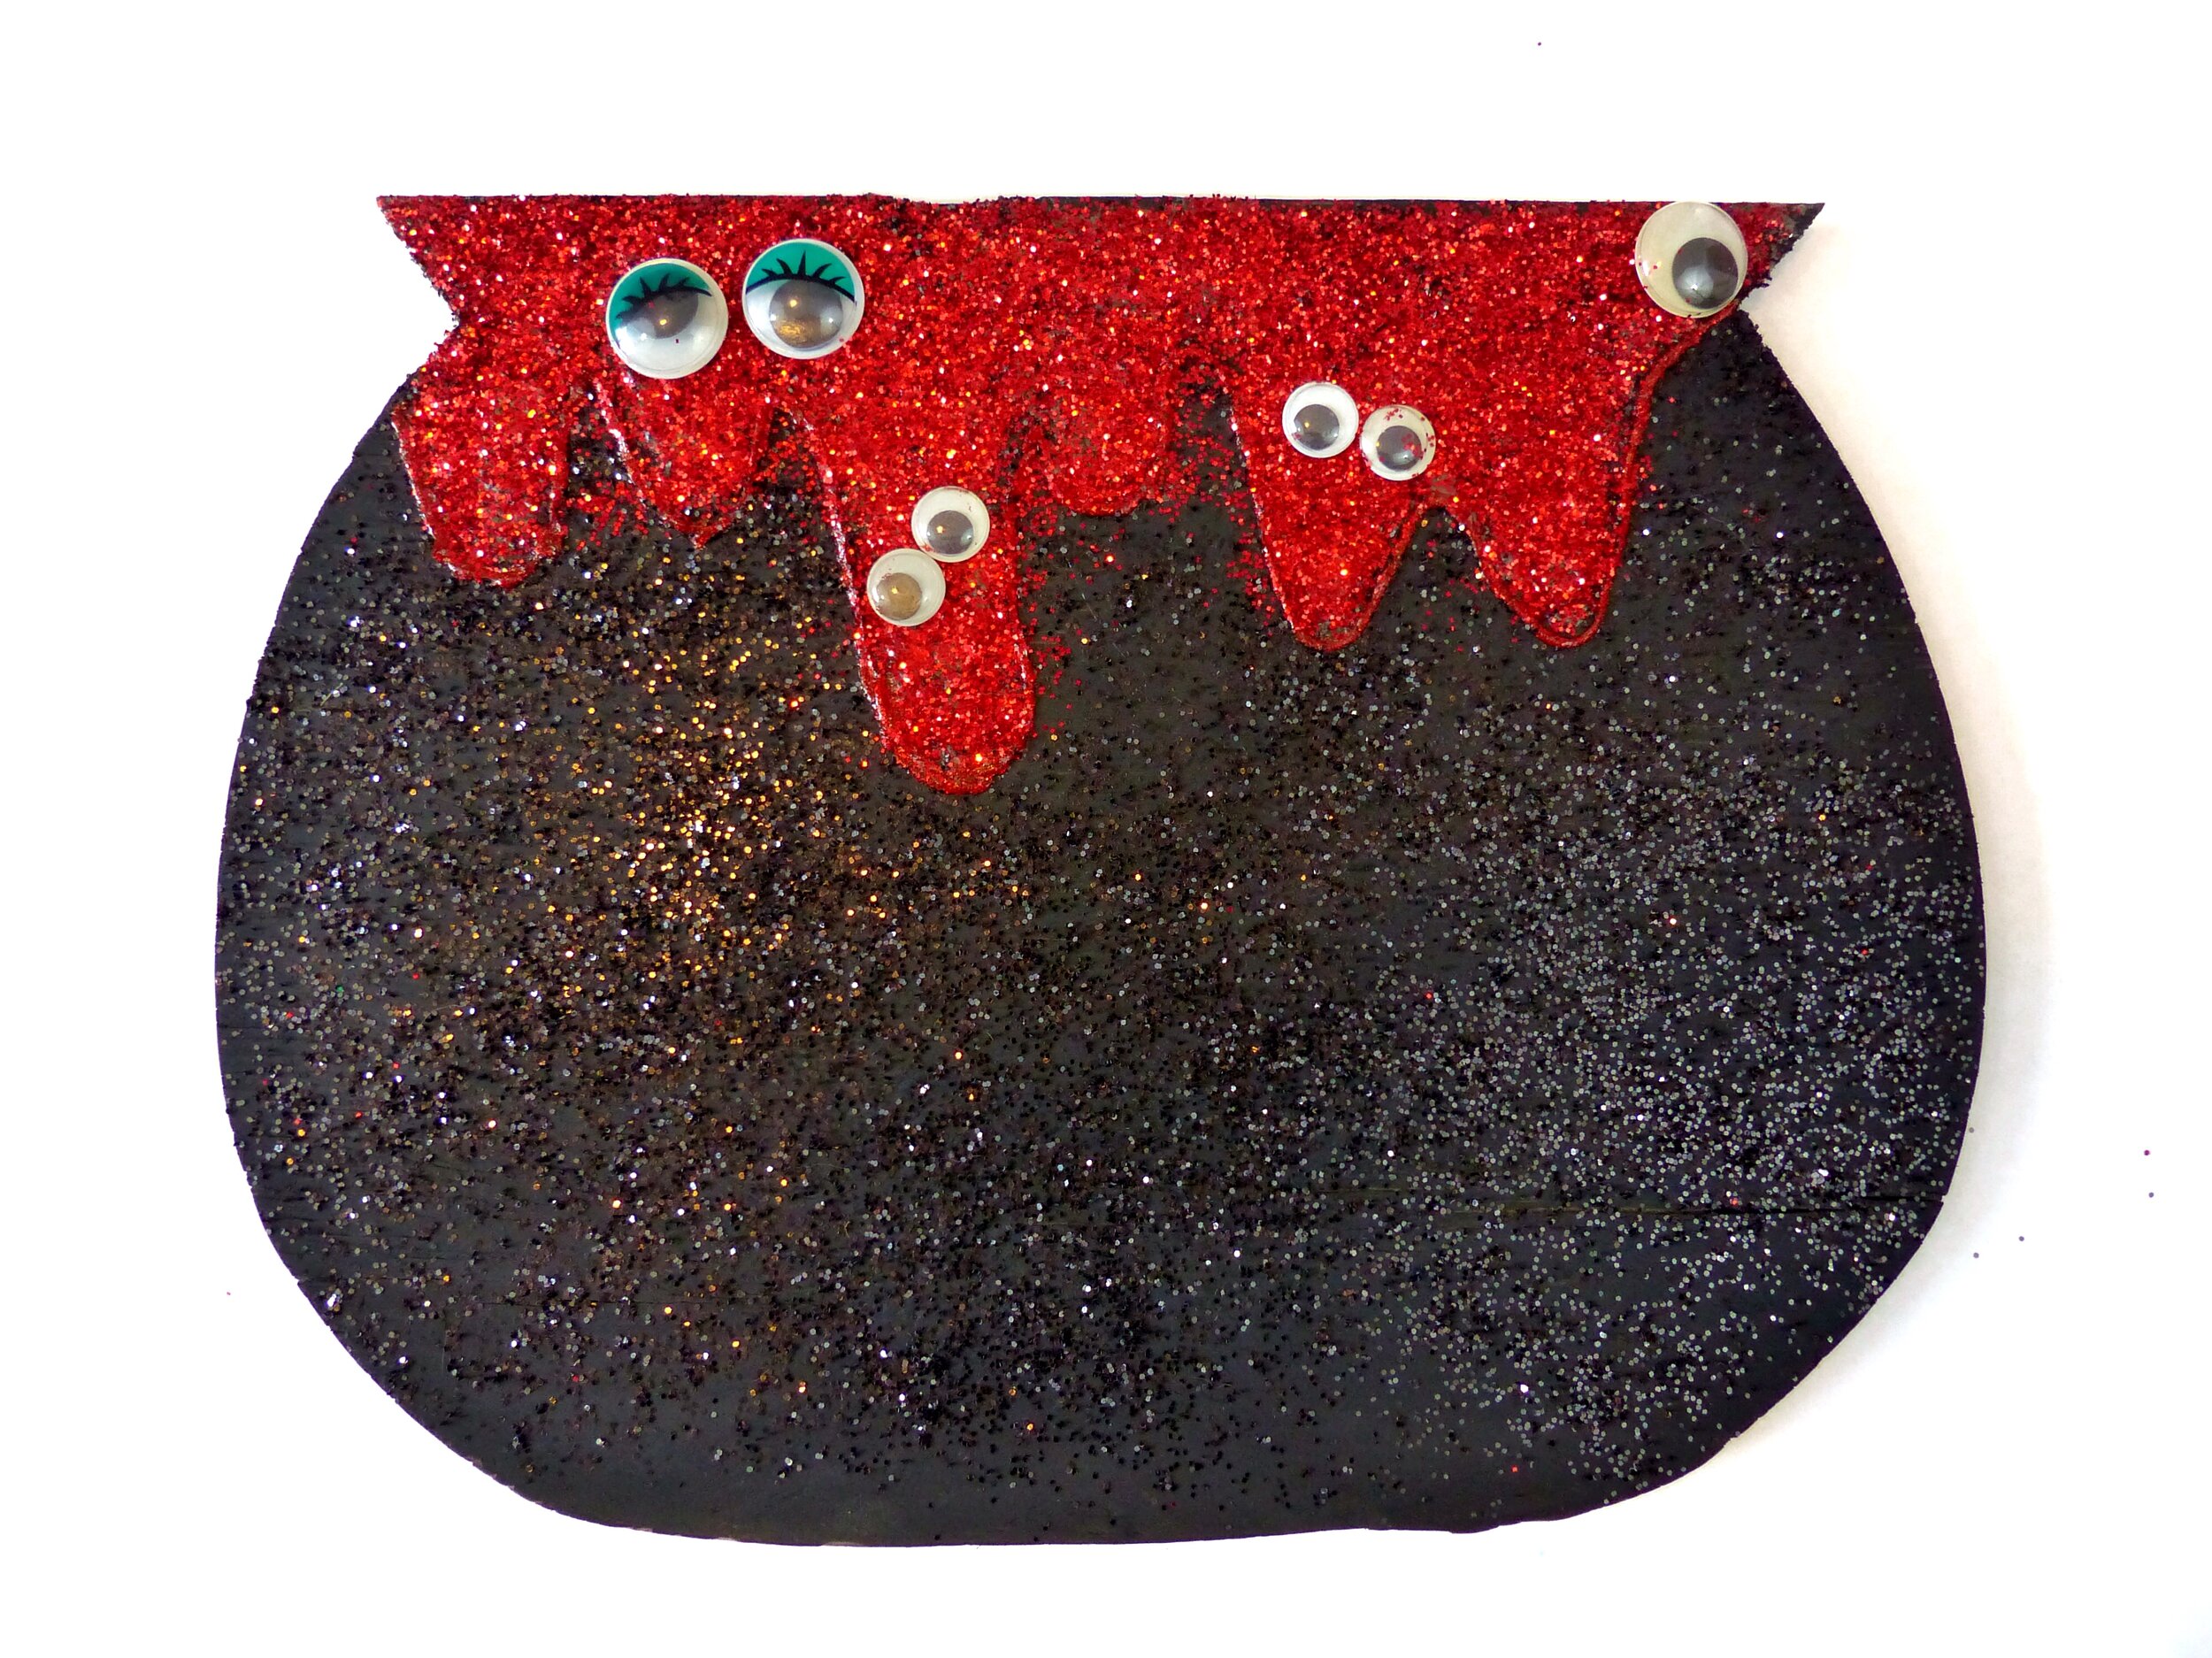
Halloween is just around the corner, and it's the perfect time to get creative with your decorations. If you're looking for a unique and whimsical addition to your spooky decor, try this DIY mini witch hat. This charming craft project is not only easy to create but will also add a touch of enchantment to your Halloween festivities.

Materials You'll Need:

  • Black felt fabric

    • 8”x8” double layered for the base

    • 10” x 9” single layered for the hat cone

  • Scissors

  • Pins

  • Hot glue gun and glue sticks

  • A template for your mini witch hat (click here to download PDF pattern pages)

  • Decorative elements like ribbon in Halloween colors like black, purple or orange, fake spiders, fake black roses, black or purple feathers. burlap ribbon (optional)

Step 1: Prepare Your Materials

Gather all your materials in one place to make the crafting process smoother.

Step 2: Cut Out the Witch Hat Shape

Pin the hat top template to single layered black felt fabric. Carefully cut around the template, making sure to keep the edges clean and smooth.

Pin the hat rim template to double layered black felt fabric. Carefully cut around the template and the center, making sure to keep the edges clean and smooth.

Step 3: Create the Cone Shape

To give your mini witch hat that classic, conical shape, you'll need to form it into a cone. Take one edge of the cut felt and roll it into a cone shape. With the fabric wrong sides together, pin and stitch along the folded side, leaving the bottom of the hat open.

Reverse right side out.

Step 4: Add a Brim

Stack the two rim pieces on top of each other. With fabric wrong sides together, pin and stitch along the outside of the hat rim.

Reverse right side out.

Step 5: Stitch the top and rim together.

Insert the bottom 1/4” of the hat top in between the center of the rim pieces. Pin and stitch into place.

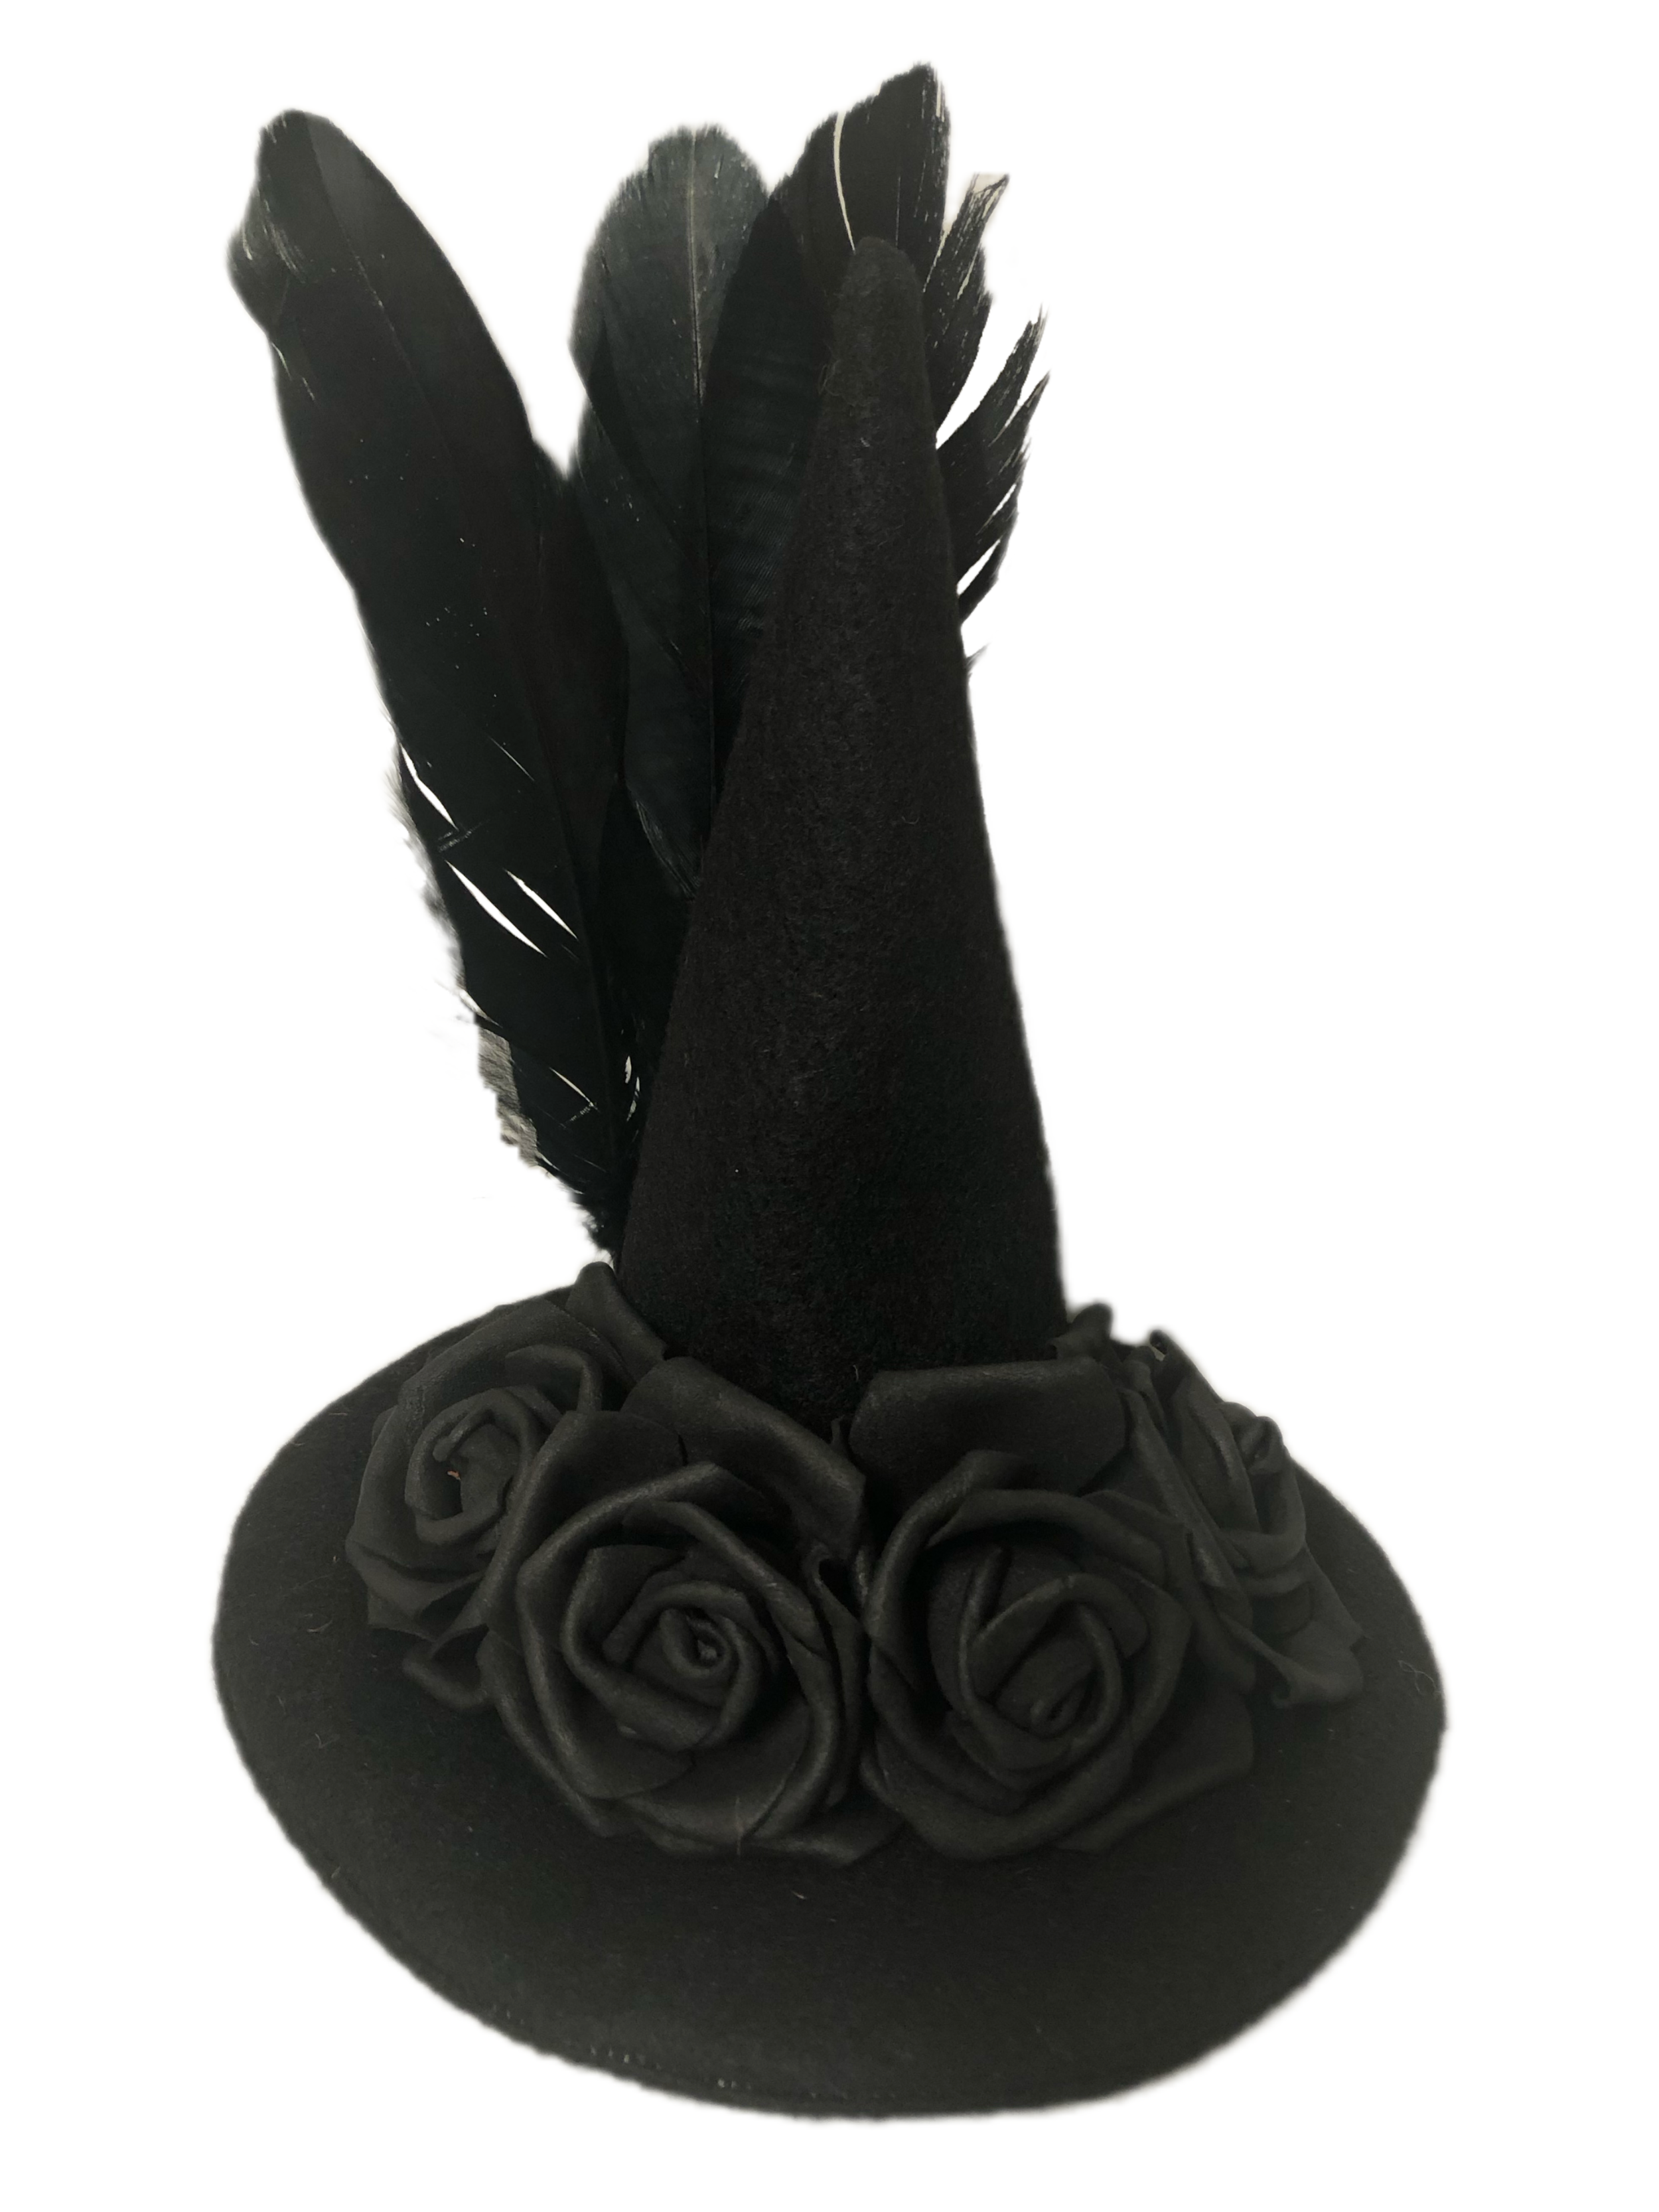
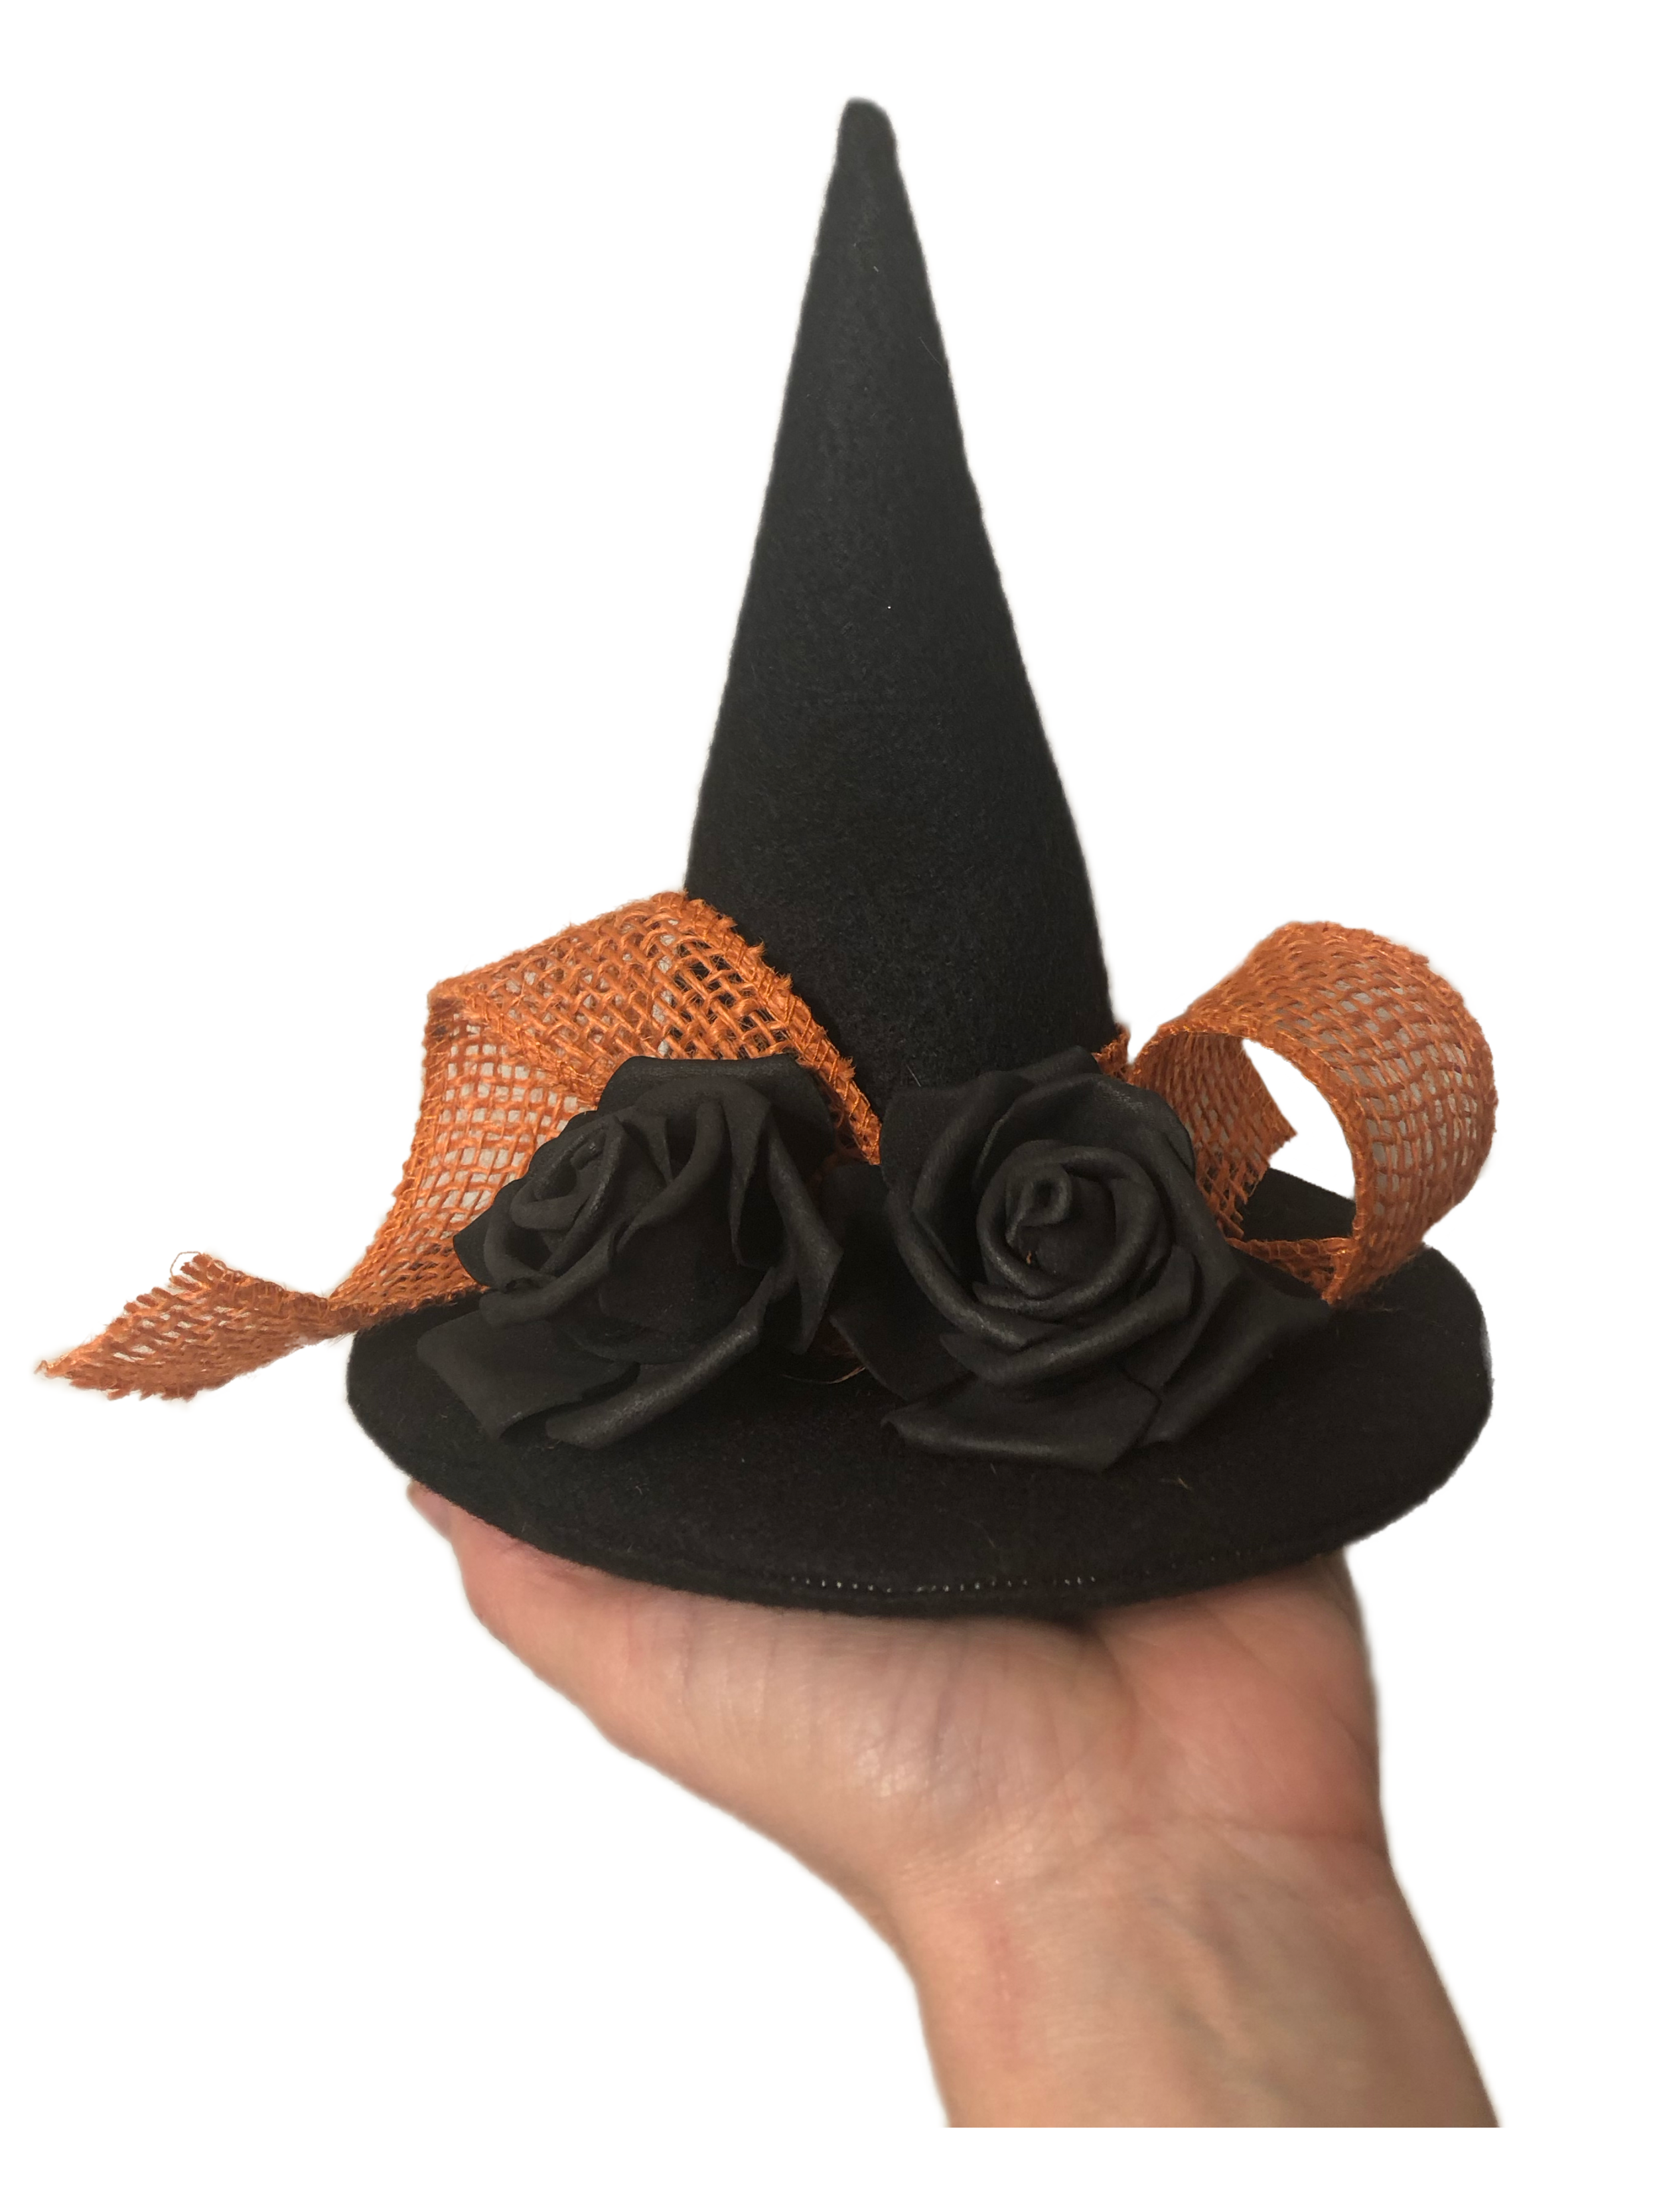
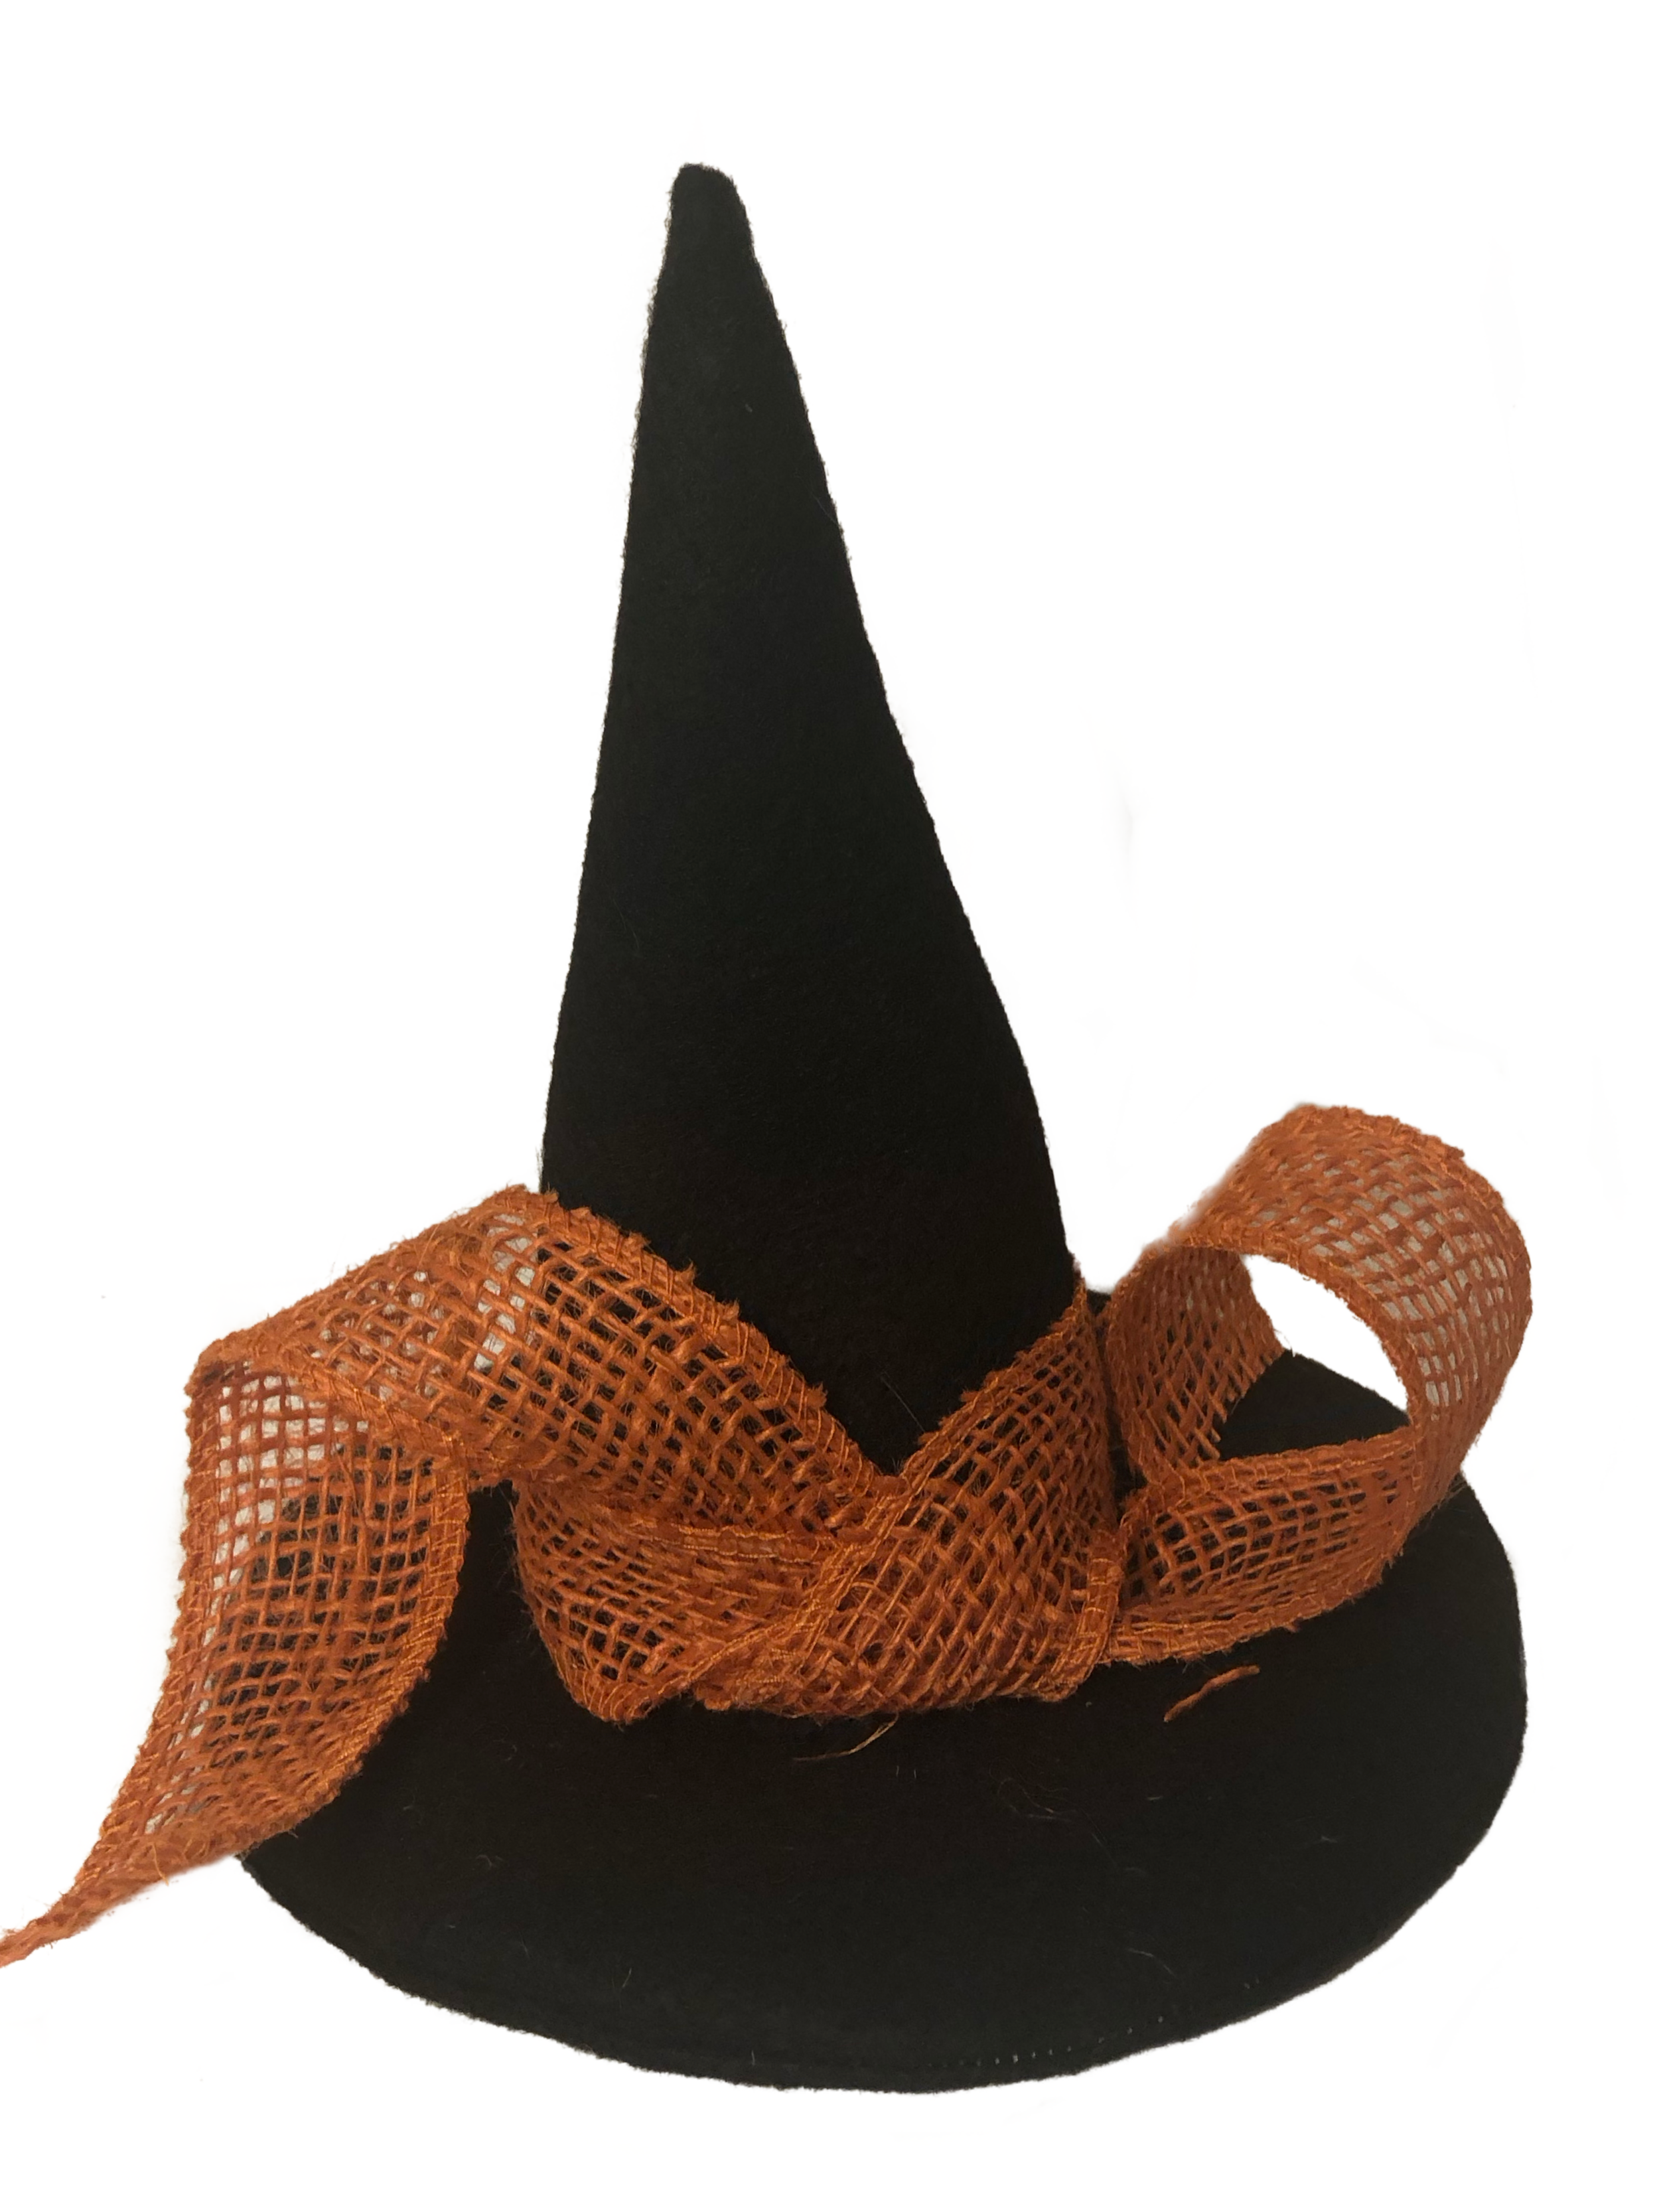
Step 6: Add Decorative Details (Optional)

Now comes the fun part – decorating your mini witch hat! You can let your imagination run wild here. Consider adding a ribbon around the base of the cone or attaching small Halloween-themed items like fake spiders or miniature pumpkins. Get creative and make it your own!

Step 7: Display with Pride

Once your mini witch hat is complete, find the perfect spot to display it. Whether it's on a mantelpiece, as a centerpiece for your dining table, or hanging from a Halloween wreath, your creation will add a touch of magic to your Halloween decor.

Creating your very own mini witch hat Halloween decoration is a delightful way to embrace the spirit of the season. This craft project is not only a fun activity but also allows you to personalize your decor with your own unique style. So, gather your materials, let your creativity flow, and craft a bewitching addition to your Halloween festivities!

Happy crafting, and have a spooktacular Halloween!

Crafting Magic: Sewing Your Own Witch Hat - Witch Hat Sewing Pattern

Halloween, Product Updates & CouponsDiana Cison

Witch hats are a classic and timeless accessory, perfect for Halloween or any costume event.

Witch hats have been an iconic symbol of enchantment and mystery for centuries. Whether you're preparing for Halloween, a themed party, or simply looking to add a touch of whimsy to your wardrobe, sewing your own witch hat is a creative and fun project. Add your own decorative elements to make your hat your own!

Materials You'll Need:

  1. Witch Hat Sewing Pattern Click here to purchase and download.
    Click here to Shop on Etsy!

  2. 1/2 yard fabric (premium felt or nylon fabric is recommended.

  3. Sewing machine or hand-sewing supplies.

  4. Craft wire

  5. Bias tape

  6. Matching thread

  7. Scissors

  8. Pins

  9. Measuring tape

  10. Optional: Decorative elements like ribbons, feathers, or beads.

Spider Patterns

Product Updates & CouponsDiana Cison

These spider patterns are the perfect combination of spooky and adorable. Delight your Halloween party guests and trick or treaters with these giant plush spiders!

All Sew Cute sewing patterns include step by step instructions with photos to help you every step of the way, especially if you’re new to sewing. They are available for instant PDF download after purchase so you can start sewing immediately.

USE COUPON CODE “halloween” for 40% off!

spider sewing pattern.PNG

Sizing/Finished Measurements: 17” long x 9” wide

Sewing Skill Level: Intermediate

Recommended for this pattern:
- 1 yard fleece fabric
- polyester stuffing
- 18mm plastic animal eyes

The cute plastic spider eyes used in the photo came from 6060 eyes on Etsy. They are available in a variety of sizes and colors.

Sizing/Finished Measurements: 18” long x 12” wide

Sewing Skill Level: Intermediate

Recommended for this pattern: 
- 1 yard fleece fabric
- polyester stuffing
- embroidery floss or crochet thread
- 40mm or 45mm plastic animal eyes

The plastic eyes used in the photo came from Glass Eyes Online on Etsy! They’re available in loads of other sizes and colors so you can customize your spider!

Free Witch Template

Free PatternsDiana Cison

Decorating for the holidays is so much fun. Add this awesome wooden party witch to the front lawn or hang her on the front door! She’s made from plywood so you’ll need a jigsaw to cut the template. But you can also make her out of poster board. Below you’ll find instructions to make both!

witch template.PNG

The template includes four masks to choose from. Choose your favorite or make all four!

mask templates.jpg

Witch Templates

Click here to download the templates.

Wooden Witch

Supplies:

  • Plywood Sandpaper

  • Black marker

  • Jigsaw

  • Glitter in a variety of colors as desired

  • Spray adhesive for wood

  • Hot glue gun or wood glue

  • Latex paint (black for hat, dress, shoes, stockings & broom, orange for hair & stockings, green for face & hands)

  • Paint brush

  • Hook to create a door hanger

  • Conduit and conduit strap to create a lawn decoration

Directions:

  1. First, cut all pattern pieces from pattern pages. Witch pattern prints on multiple pages and will need to be taped together. Match up the letters and use as a guide when taping together. Tape along the dotted lines.

  2. Trace the witch and broom patterns on the plywood using a black marker.

  3. With a jigsaw, cut around the design.

  4. Using sandpaper, smooth out the wood around the entire edge of the design.

  5. Paint the witch and broom using latex paint. (We used black for hat, dress, shoes, stockings & broom, orange for hair & stockings, green for face and hands.) Let dry completely.

  6. Spray with adhesive spray for wood and using various colors, sprinkle with glitter as desired. (We used blue for boots, orange for stockings & hat, purple for dress, green for face, red for hat, gold for hat band and silver for broom.) Let dry completely.

  7. Choose which style glasses you would like for your witch. Trace the glasses pattern on the plywood and with a jigsaw, cut around the design. You will not need to cut out the hole in the middle of glasses. With sandpaper, smooth out the edges.

  8. Paint the glasses with latex paint in whatever color desired.

  9. To decorate the glasses with glitter, lay the paper mask pattern on the wooden glasses. The eye holes should be cut out of the paper pattern. Spray the eye holes with adhesive spray. Remove paper pattern and sprinkle with glitter in whatever color desired. Let dry completely. Spray the rest of the glasses with adhesive spray. Sprinkle with glitter in whatever color desired. Let dry completely.

  10. Using wood glue or a hot glue gun, glue the glasses to the witch’s face.

Door Hanger -

To create a door hanger, screw a hook into the top of the witch’s head and hang to the door with a nail and hammer.

Lawn Decor -

To create a lawn decoration, hammer a 4 foot conduit into the ground, sinking about 6 inches into the ground. Attach the back of the witch to the conduit with a conduit strap.

Paper Witch

Supplies:

  • Black poster board

  • Glitter in a variety of colors as desired

  • Spray adhesive for paper

  • Acrylic paint in a variety of colors

  • Pencil

  • Scissors

  • Tacky glue

  • Ribbon to create a hook to hang

Directions:

  1. Using a pencil, lightly trace the witch and broom patterns on white poster board and cut.

  2. Using a pencil, lightly trace the glasses pattern on white poster board. You don’t need to cut out the holes in the glasses. You will cover these areas with glitter.

  3. Using acrylic paints, paint the witch and broom as desired. Let dry completely.

  4. Decorate with glitter. Spray the area you’d like to cover on the witch and broom with adhesive spray. Sprinkle with glitter. Spray and cover remaining areas until finished. Let dry completely.

  5. To decorate the masks with glitter , place the paper pattern on top of the mask. Your eye holes should be cut out of the paper pattern. Carefully spray the eye hole area with adhesive spray and sprinkle with glitter. Let dry completely. Next, spray the area around the eye holes with adhesive spray and cover with glitter. Let dry completely.

  6. Glue the masks to the witch’s face.

  7. Glue the broom to the witch's body.

  8. Loop a 4 inch ribbon to the back of the top of the witches hat to create a hook to hang.

halloween DIY.PNG

Halloween Patterns

Create a spooky attack cat, spider or owl for the holidays

DIY Halloween Decorations

Product Updates & CouponsDiana Cison

Create a spooky (yet adorable) decor to turn your house into a Halloween haven!
Spiders and cats and ghosts oh my! All Halloween patterns include step by step instructions with photos and pattern pieces. Available for instant PDF download so you can starting sewing immediately.

COUPON CODE

Use coupon code HALLOWEEN for 40% off any Halloween pattern.

The Witch's Closet - Witch Templates

Free PatternsDiana Cison
witchs closet.jpg

What’s in your witch’s closet?

Free witch templates!

Download these fun witch templates to make awesome Halloween decor.  Spooky items you’d find in every witch’s closet!

  • floppy witch hat

  • fancy witch hat

  • witch’s boot

  • broom

  • cauldron

Click here to download the pattern pages and instructions.

Options for materials:

You have a variety of  materials to choose from for creating the items in your witch’s closet. You can choose from: fabric, wood or paper. Instructions are included for all three.

  • Fabric:
    You will whipstitch by hand a flat door hanger using felt fabric, embroidery floss and a needle.

  • Wood:
    Will require plywood and a jigsaw. Attach a hook at the top and create a door hanger.

  • Paper:
    The best options for creating a paper project are poster board or foam board. You will need a craft knife to cut the foam board.

Witch’s Boots

Cut the templates or pattern pieces:

First, cut all pattern pieces from the pattern pages. Patterns print on multiple pages and will need to be taped together. Match up the letters and use as a guide when taping together. Tape along the dotted lines. You will use the same template for all three options (fabric, wood or paper).

witchs fancy hat.JPG

Witch’s Fancy Hat

Felt Fabric Door Hanger

Supplies:

  • Black felt fabric

  • Black embroidery floss and needle

  • Pins

  • Scissors

  • Red felt fabric for bloody goo (cauldron only)

  • Plastic google eyes (for cauldron only)

  • Hot glue gun (for cauldron only)

  • Adhesive spray for fabric/paper

  • Glitter in a variety of colors as desired.
    desired.

Instructions:

  • Choose your pattern.

  • Pin the pattern on felt fabric and cut four pieces. Your door hanger will have four layers of fabric.

  • Using black embroidery floss and needle, whipstitch all four layers together.
    Visit Sewing Bee University for a quick whipstitch tutorial. Click here.

  • For the cauldron, cut the bloody goo out of red felt fabric and glue to the top of the cauldron using a hot glue gun. Glue google eyes to the red felt as desired.

  • Spray the fabric with adhesive spray and sprinkle with glitter as desired.

  • Create a loop at the top of the project so you can hang. Using a 4 inch piece of embroidery floss, feed the floss through the top of the project with a needle. Create a knot at the ends.

  • Hang.

IMG_4886.JPG

Witch’s Cauldron

Wooden Door Hanger

Supplies:

  • Plywood

  • Sandpaper

  • Black marker

  • Jigsaw

  • Glitter in a variety of colors as desired

  • Spray adhesive for wood

  • Plastic google eyes and hot glue gun for cauldron only (optional)

  • Black acrylic paint

  • Red acrylic paint for cauldron only

  • Paint brush

  • Hook to create a door hanger

Directions:

  • Trace the pattern on the plywood using a black marker.

  • With a jigsaw, cut around the design.

  • Using sandpaper, smooth out the wood around the entire edge of the design.

  • Paint using black latex paint. Let dry completely.

  • For the cauldron, paint the red bloody goo using red latex paint.

  • Hot glue plastic google eyes to the red goo as desired.

  • To add glitter, spray the area with spray adhesive and carefully sprinkle on the glitter.

  • To create a door hanger, screw a hook into the top and hang to the door with a nail and hammer.

witchs hat.JPG

Witch’s Hat

Paper Door Hanging

Supplies:

  • Black poster board or foam board

  • Craft knife (if using foam board)

  • Glitter in a variety of colors as desired

  • Spray adhesive for paper

  • Plastic google eyes for cauldron only

  • Pencil

  • Scissors

  • 4” ribbon to hang

Directions:

  • Using a pencil, lightly trace the pattern on black poster or foam board.

  • Cut with scissors if using poster board. Cut with a craft knife if using foam board.

  • To decorate with glitter, spray the desired area with adhesive spray. Sprinkle with glitter in color desired. Let dry completely.

  • For the cauldron, spray the red goo area with adhesive spray and sprinkle with red glitter. Glue google eyes as desired.

  • Create a loop with a piece of ribbon and glue or tape to the back of your door hanging. Use to hang.